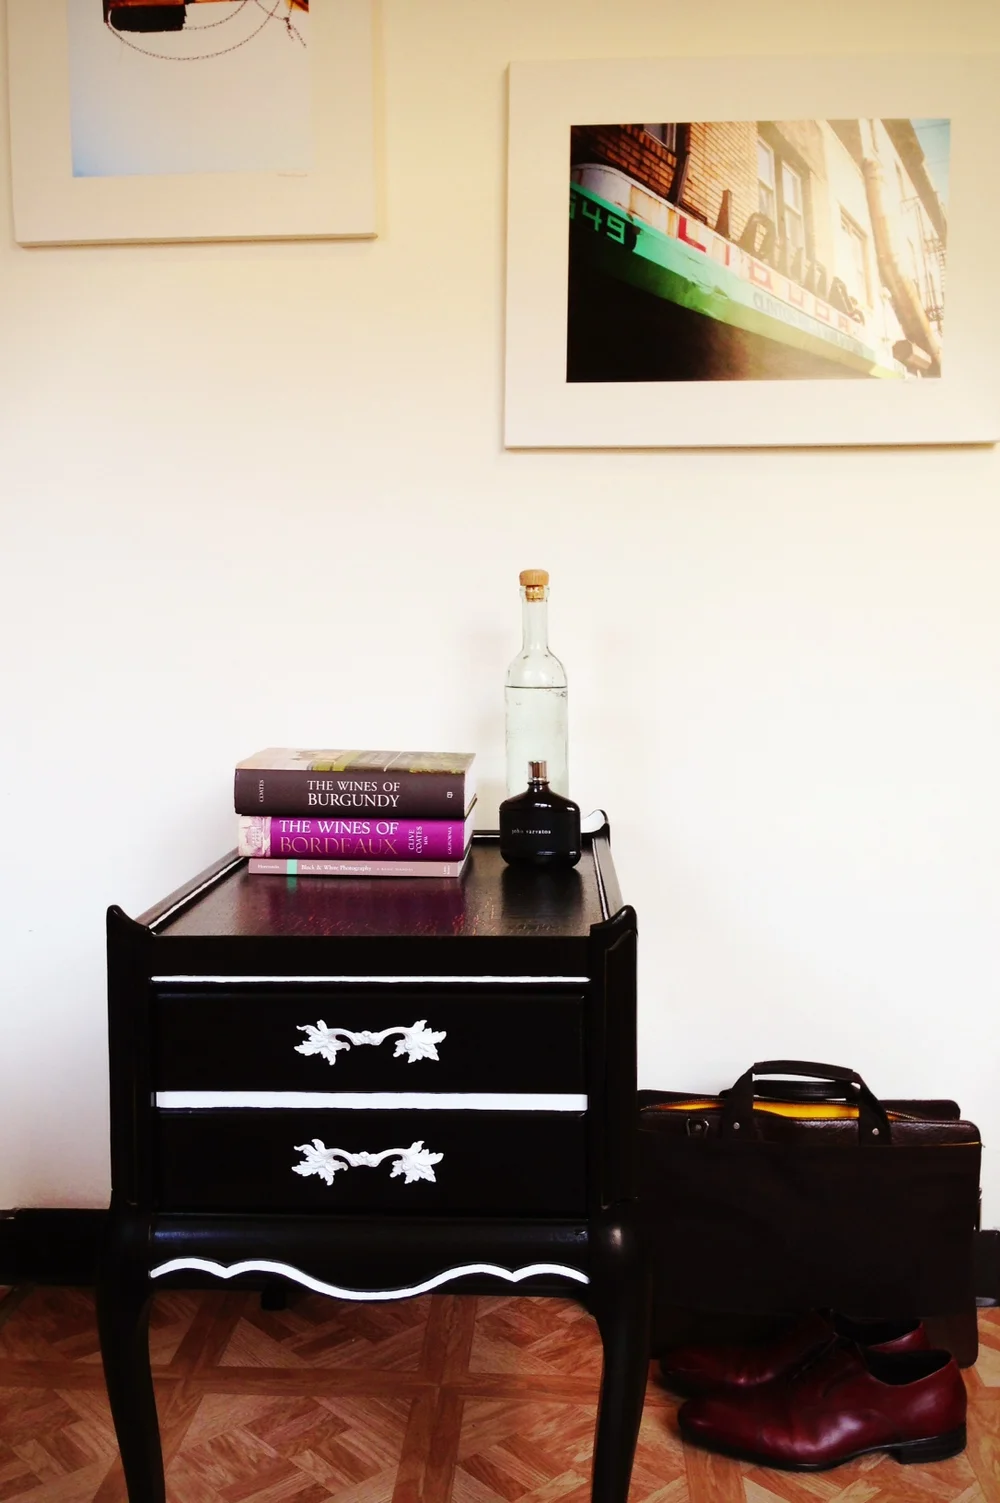
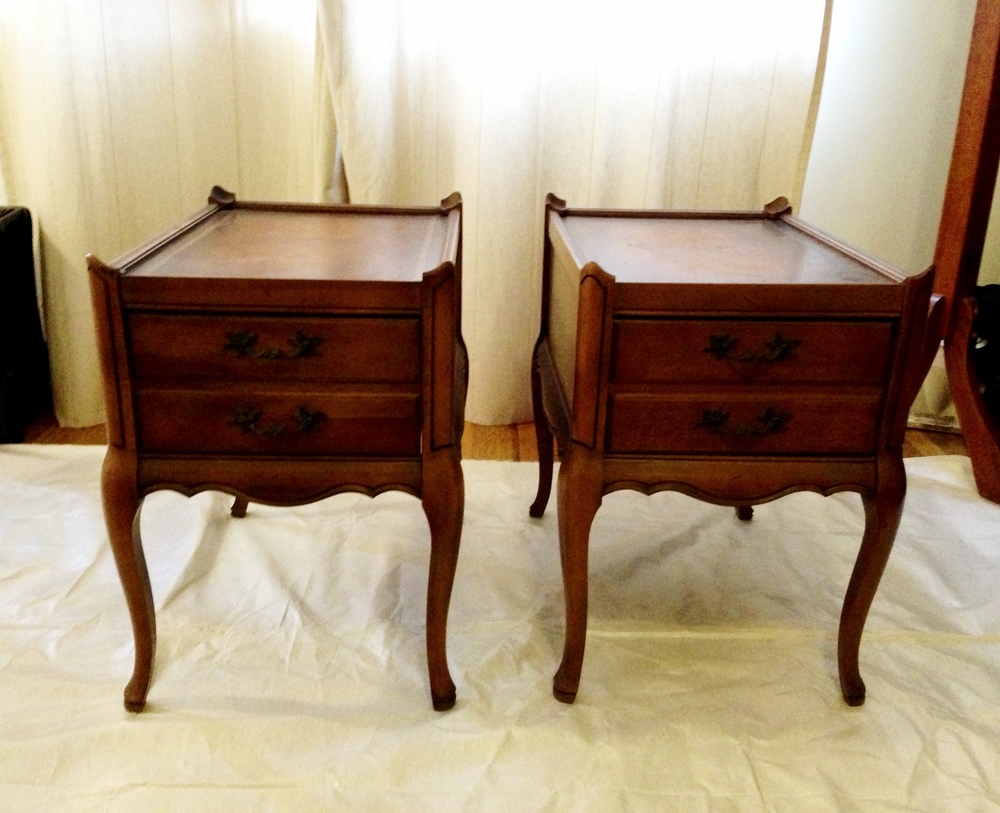
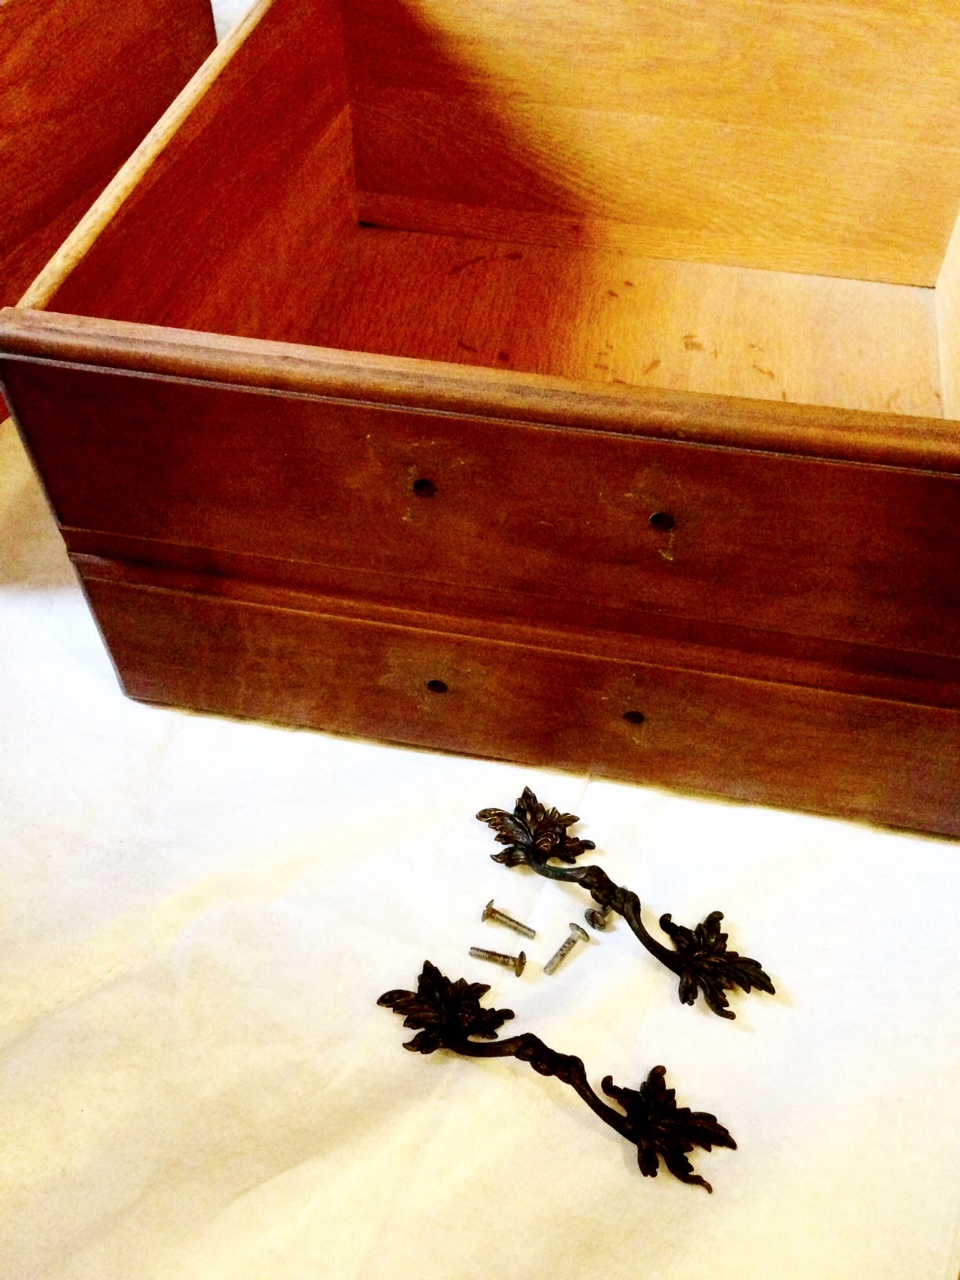
The moment my boyfriend brought these home from the salvation army, I knew I had the perfect DIY on my hands! I was so impressed by all the details on these end tables, and those wonderful iron handles. Here's a look into how I "brought" these into the 21st century!
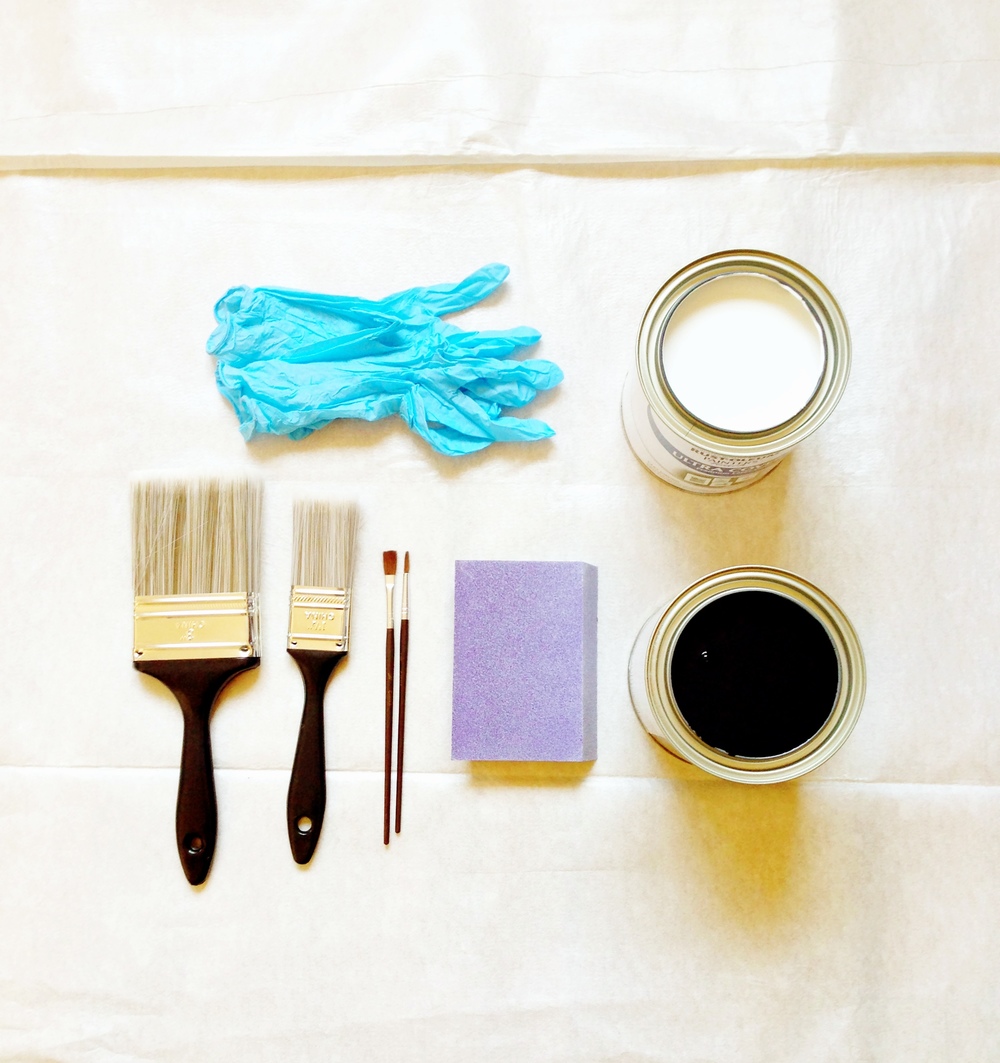
Supplies needed:
- Paint: I choose black for the base and white as the detail accent. My preference was the flat finish paint.
- Brushes: one large for the base coat, one medium for smaller areas of detail and one very small brush for all the detail work (tip: buy a good small brush, the detail work will come out better)
- Drop cloth
- Gloves
- Rough sanding paper
- Screw driver
- Music!
I began by sanding down every surface, you want to make sure you have a good, even surface and a little grain for the paint to sink into. Wipe down with a wet cloth after you you sand.


Don't forget to remove the handles!
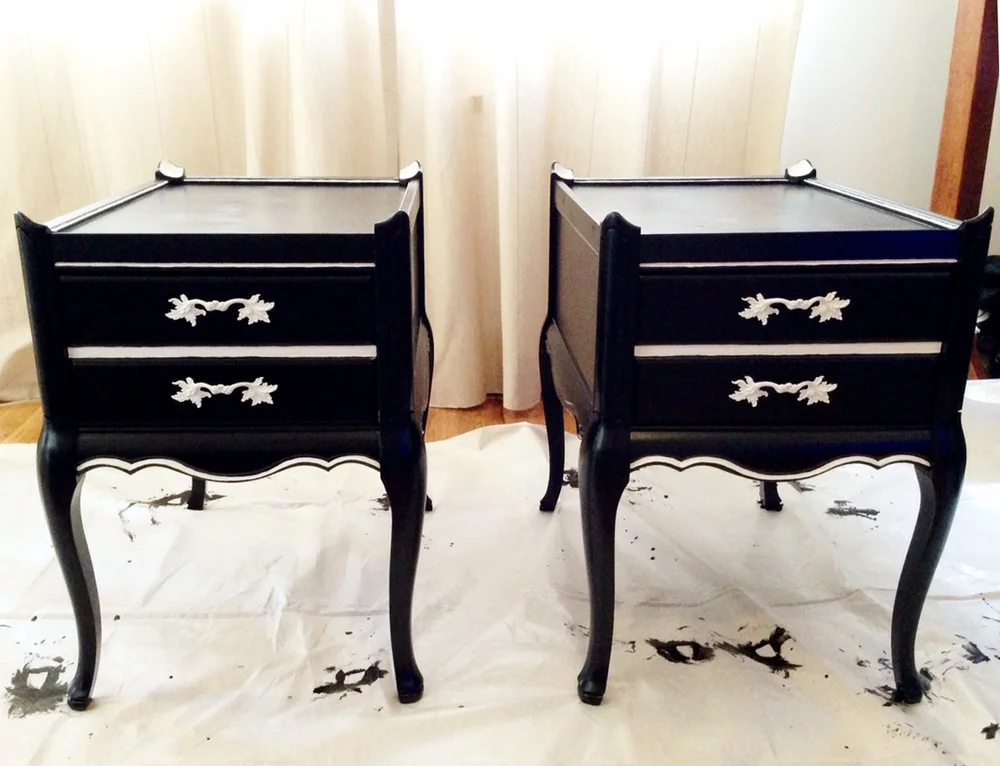
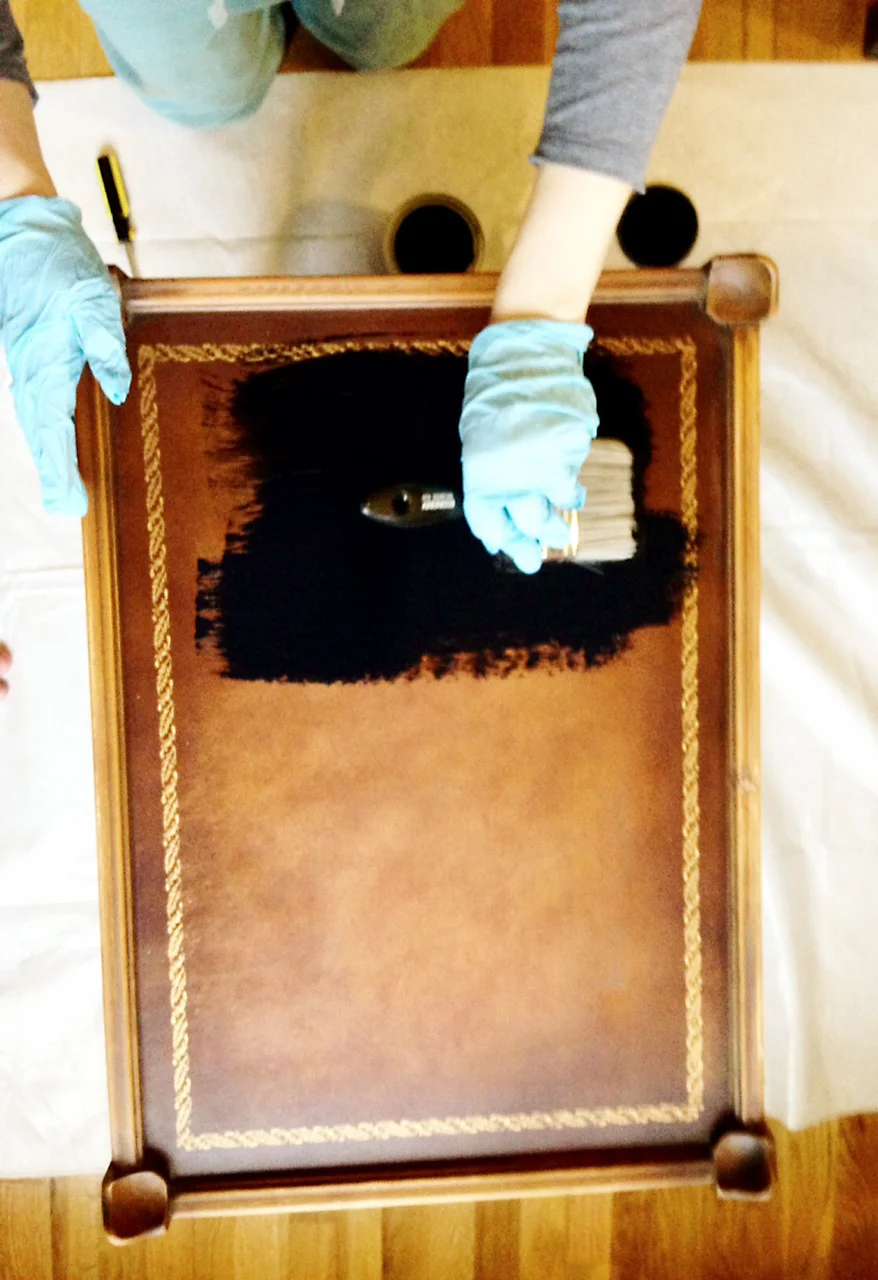
Get to work painting! Make sure to take long, even strokes so that the paint lays flatly. Get into all those nooks and crannies! You will need two coats of black.
Once the black paint dries, map out where you want the accent paint. I chose to paint the grooves on the top of the four corners (so cute!), the groove connecting the four corners, the iron handles, the top groove on the sides of the units, and the bottom curves of the units. Don't go over board on the accents. A little goes a long way. Plus...it takes more time than you think!
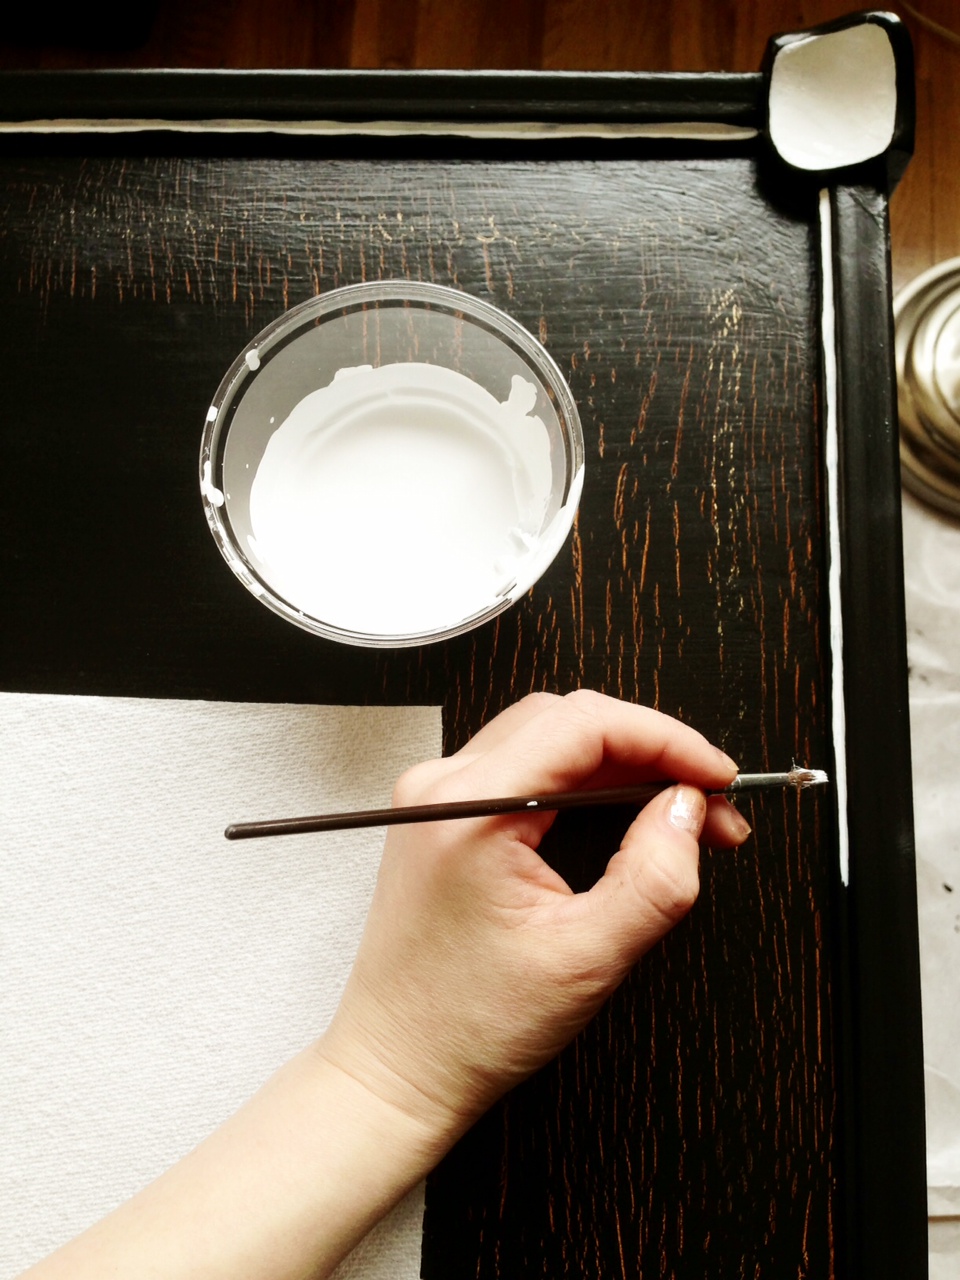


Each coat of white will need two layers, so pace yourself and put on some good music!
Part of the DIY process is being flexible, everything is not going to go the way you want it to. So be open to changes, and keep that creative hat on!
Ta-da!